Instructions for setting up remote access to systems available only from the internal network of the Faculty of Science (e.g., CIS).
For access to only the faculty's information resources ("scientific articles"), you can also use EZ Proxy (without the need to configure anything in the browser). However, by following this guide, you will also be able to access all the faculty's information resources.
What is a proxy server?
When using a proxy server, users' browsers read data from the network through a computer (proxy server) located at the faculty. The purpose of the proxy server is to allow its user to appear on the Internet as if they were connected from the faculty's network.
Setup Instructions
For access to only the faculty's information resources ("scientific articles"), you can also use EZ Proxy (without the need to configure anything in the browser). However, by following this guide, you will also be able to access all the faculty's information resources.
Google Chrome
The recommended setup is through the extension FoxyProxy. This extension replaces the previous, now unsupported, extension SwitchySharp.
The FoxyProxy extension allows you to easily switch between proxy and direct connection either automatically or manually, which is often very useful.
- Download the right-click and select Save link as... FoxyProxy configuration file, which has the configuration ready for automatically enabling the proxy server only when accessing CIS
- Install the extension from the page FoxyProxy and click Add to Chrome
- To the right, next to the address bar, the application icon (fox head) will appear

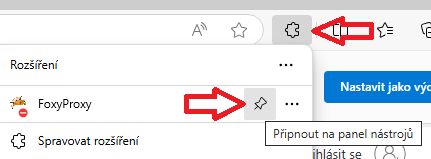
- If the application icon does not appear, click on the extensions icon and pin FoxyProxy by clicking on the Pin icon to the toolbar
- Then click on FoxyProxy left-click and select Options

- In the top menu, click Import, then expand the Import from older versions option and click the Import button
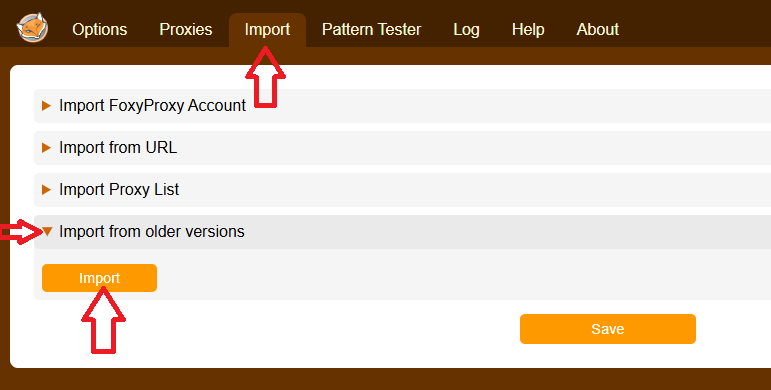
- Upload the "FoxyProxy_natur.json" file from step 1
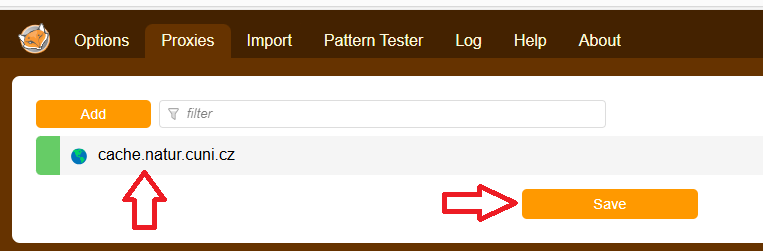
- Check if the proxy cache.natur.cuni.cz has been added and click Save
- Clicking left-click on the FoxyProxy icon, set the mode to Proxy by Patterns – for CIS access, the faculty proxy will be automatically used, otherwise, it is turned off
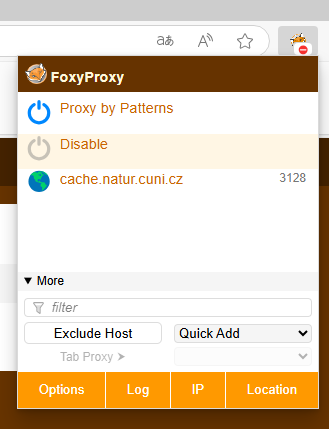
- You can quickly toggle between proxy states by clicking left on the FoxyProxy icon
- After setting up the proxy, your browser will prompt you to authenticate when accessing websites. Use your faculty login (vas_login@natur.cuni.cz) and CAS password.
Firefox
The recommended setup is through the extension FoxyProxy. This extension allows you to easily switch between proxy and direct connection either automatically or manually, which is often very useful.
- Download the right-click and select Save link as... FoxyProxy configuration file, which has the configuration ready for automatically enabling the proxy server only when accessing CIS
- Install the extension from the page FoxyProxy and click Add to Firefox
- To the right, next to the address bar, the application icon (fox head) will appear
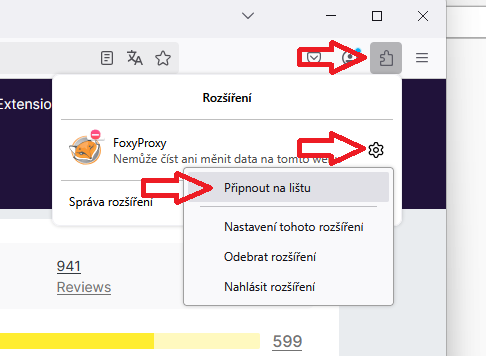
- If the application icon does not appear, click on the extensions icon, then click on the gear icon next to FoxyProxy and select Pin to toolbar
- Then click on FoxyProxy left-click and in the bottom part, select Options
- In the top menu, click Import, then expand the Import from older versions option and click the Import button
- Upload the "FoxyProxy_natur.json" file from step 1
- Check if the proxy cache.natur.cuni.cz has been added and click Save
- Clicking left-click on the FoxyProxy icon, set the mode to Proxy by Patterns – for CIS access, the faculty proxy will be automatically used, otherwise, it is turned off
- You can quickly toggle between proxy states by clicking left on the FoxyProxy icon
- After setting up the proxy, your browser will prompt you to authenticate when accessing websites. Use your faculty login (vas_login@natur.cuni.cz) and CAS password.
Microsoft Edge
The recommended setup is through the extension FoxyProxy. This extension allows you to easily switch between proxy and direct connection either automatically or manually, which is often very useful.
- Download the right-click and select Save link as...FoxyProxy configuration file, which has the configuration ready for automatically enabling the proxy server only when accessing CIS
- Install the extension from the page FoxyProxy and click Add to Edge
- To the right, next to the address bar, the application icon (fox head) will appear
- If the application icon does not appear, click on the extensions icon and pin FoxyProxy by clicking on the Pin icon to the toolbar
- Then click on FoxyProxy left-click and select Options
- In the top menu, click Import, then expand the Import from older versions option and click the Import button
- Upload the "FoxyProxy_natur.json" file from step 1
- Check if the proxy cache.natur.cuni.cz has been added and click Save
- Clicking left-click on the FoxyProxy icon, set the mode to Proxy by Patterns – for CIS access, the faculty proxy will be automatically used, otherwise, it is turned off
- You can quickly toggle between proxy states by clicking left on the FoxyProxy icon
- After setting up the proxy, your browser will prompt you to authenticate when accessing websites. Use your faculty login (vas_login@natur.cuni.cz) and CAS password.
Setting up mobile devices (Apple iPad, iPhone):
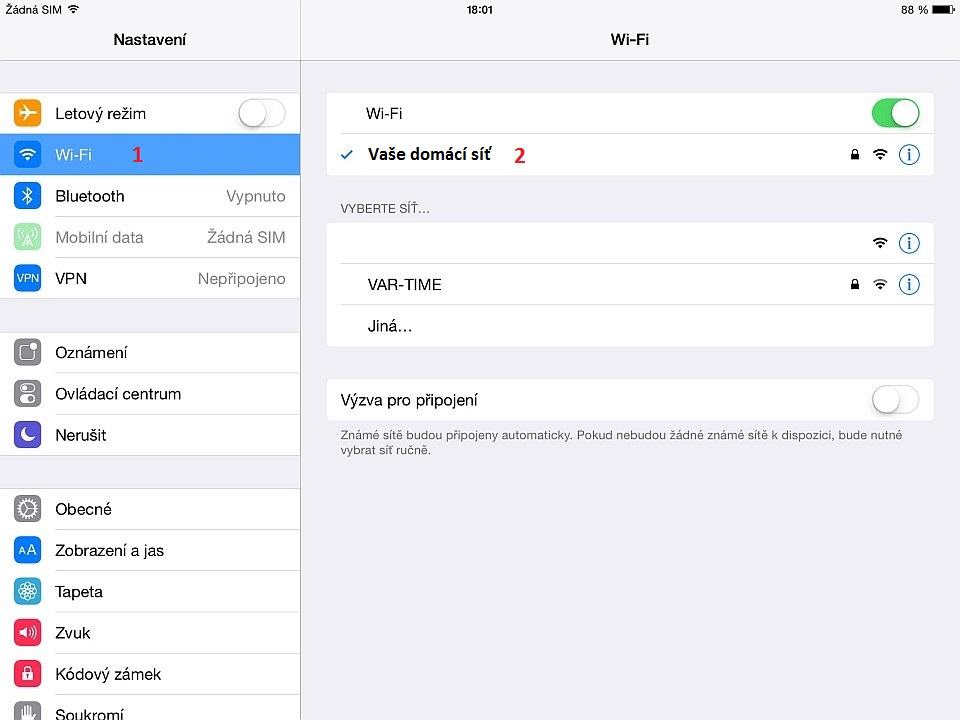
- On the home screen, click on the Settings icon and then select the Wi-Fi section
- Click on the name of your wireless home network that you are connected to
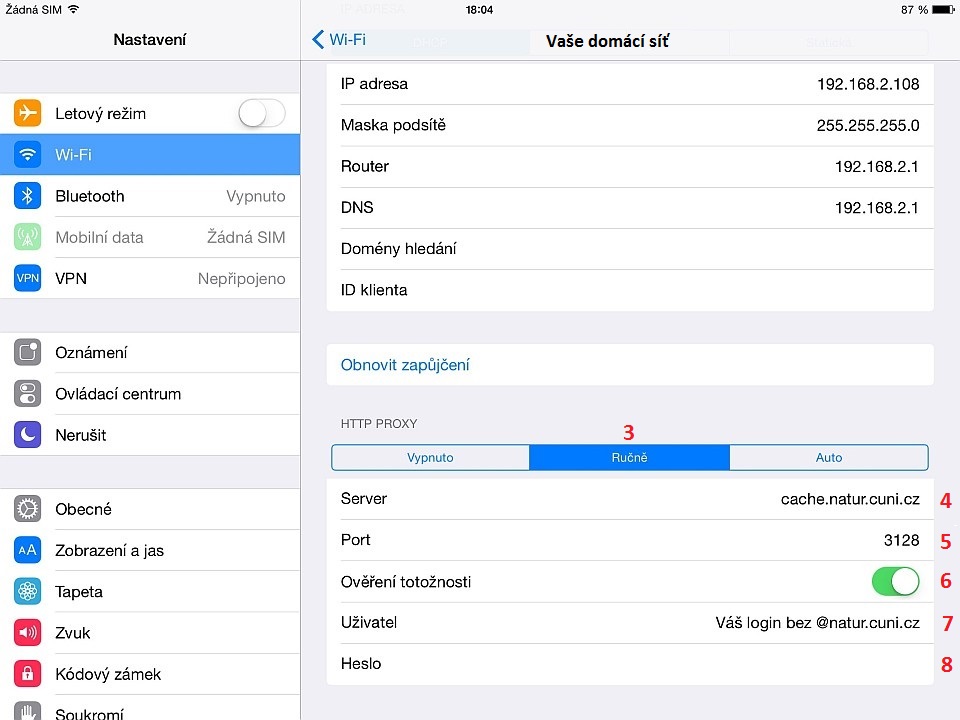
- At the bottom, switch the HTTP PROXY mode to Manual
- Enter the value "cache.natur.cuni.cz" into the Server field
- Enter the value "3128" into the Port field
- Enable Authentication
- Once you have set up the proxy, your browser will prompt you to authenticate when accessing websites. Use your faculty login (vas_login@natur.cuni.cz) and password for CAS.